
Why Azure Virtual Desktop?
Azure Virtual Desktop (AVD) is our cloud desktop platform, built on Microsoft Azure for improved performance, security, speed and ease of use. Below are some of the key benefits.
Faster connection
A modern, reliable connection for a smoother remote desktop experience.
Improved performance
Newer, faster hardware delivers better app and desktop performance.
Better security
Microsoft Authenticator protects every connection with multi-factor authentication.
Terminology
| Shorthand | Definition |
|---|---|
| AVD | Azure Virtual Desktop |
| MFA | Multi Factor Authentication |
| macOS | Apple Mac Operating System |
| Windows | Microsoft Windows 10/11 Operating System |
| Windows App | Application used to access AVD |
| Virtual Machine | A virtual operating system / computer |
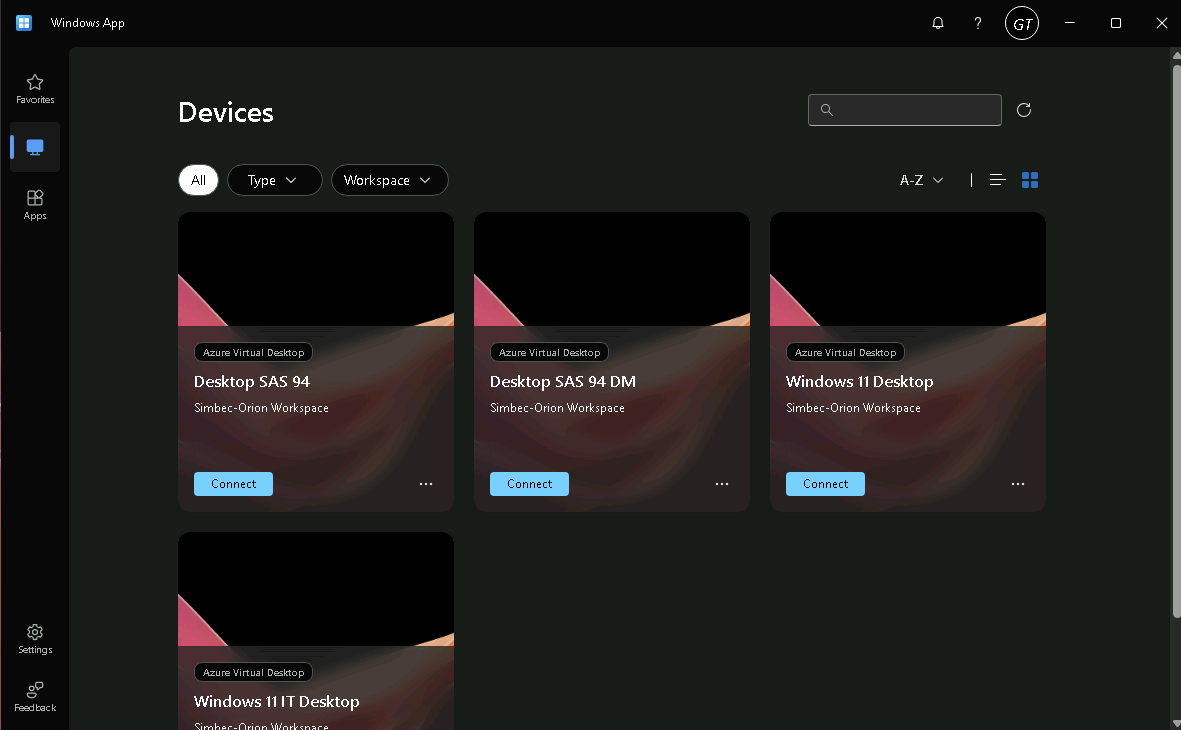
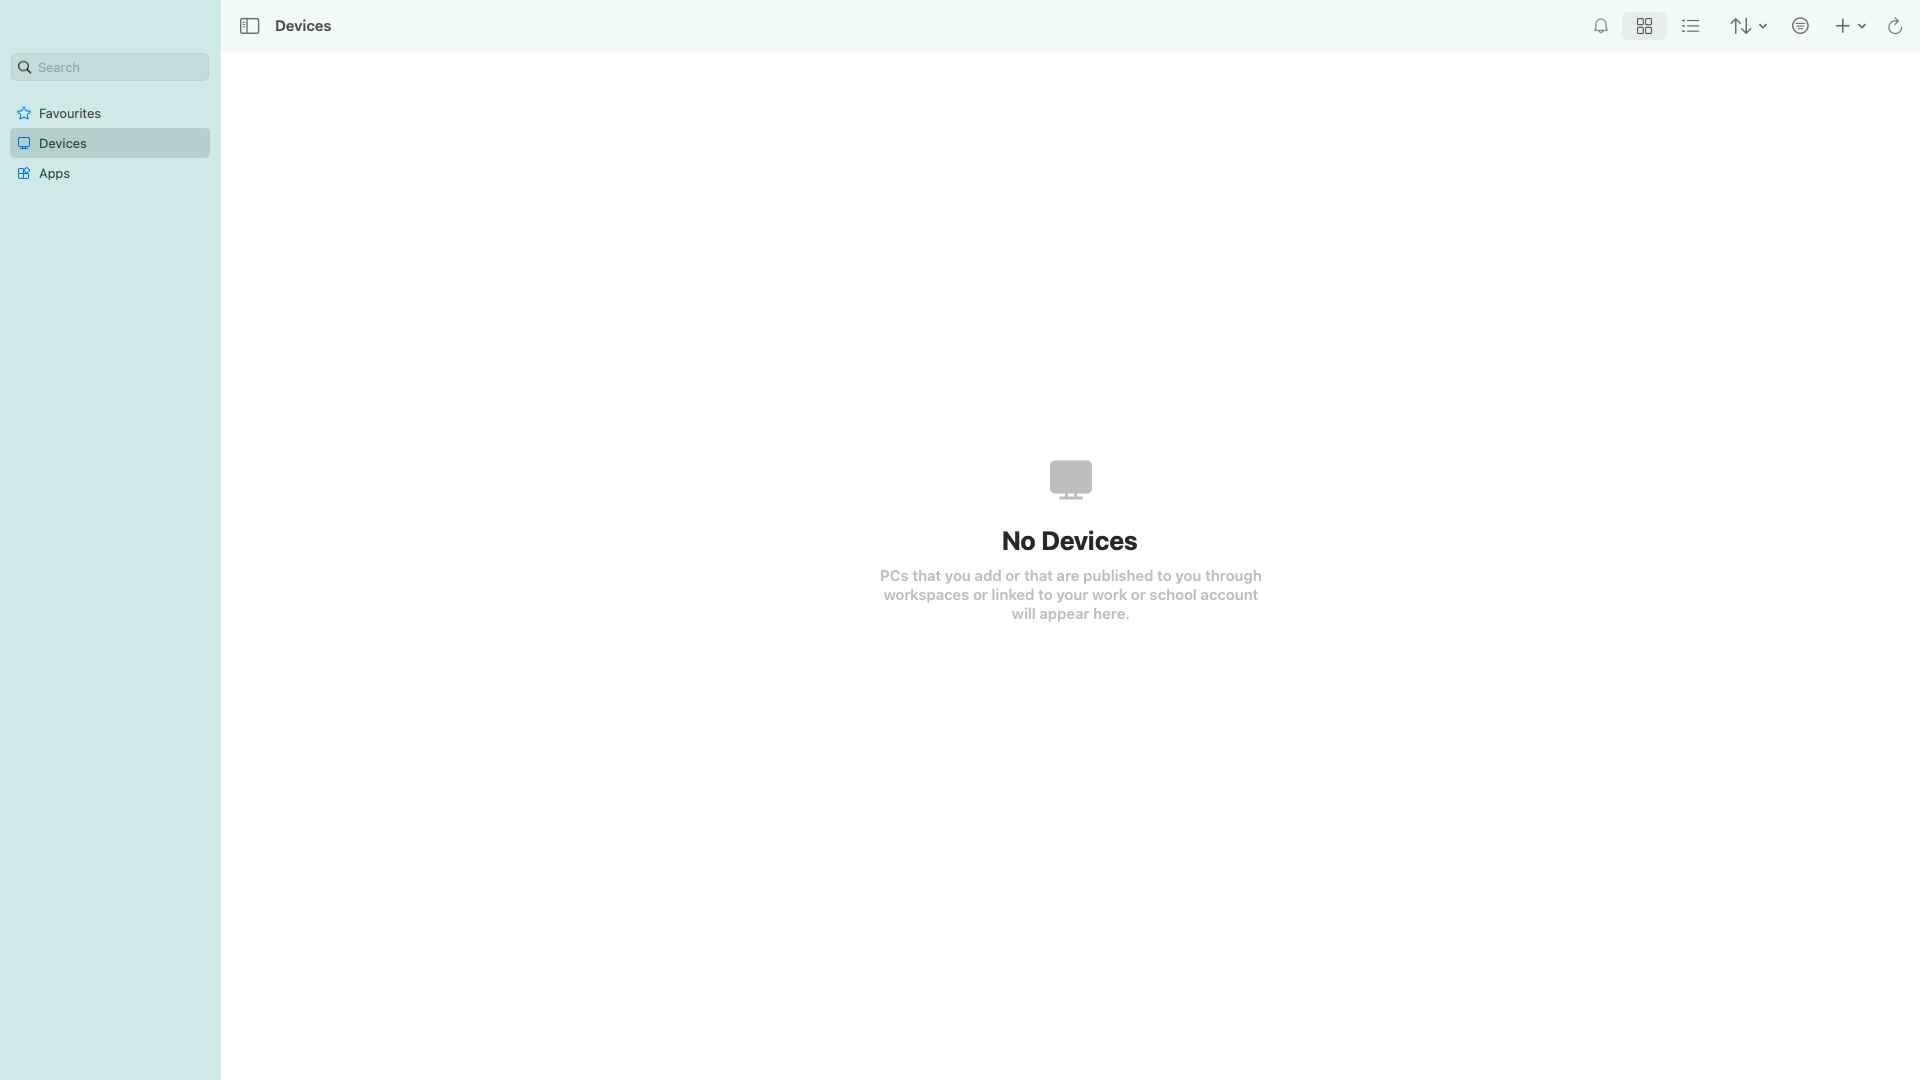
Simbec Orion Employees
If you use a Simbec Orion laptop, the Windows App is provided to you through the Company Portal. Follow the steps below to connect to AVD.
i How do I connect to AVD?
You should see the Windows App provided to you in the Company Portal, ready for download.
- Open the Company Portal on your Simbec Orion laptop.

- On the left-hand side, locate the “Apps” tab and find the “Windows App” from Microsoft Corp.
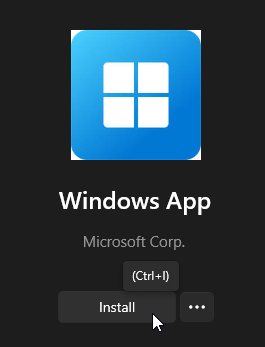
- Click on it and then click “Install”.
- Wait for the installation to finish — you’ll then find it in your Start menu.

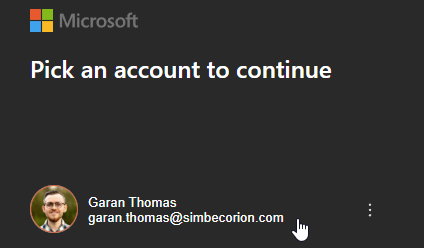
- Open the “Windows App”. You may be signed in automatically; if not, select your @simbecorion.com account and enter your password if required.
- Once signed in, you’ll see the desktops and applications provisioned to you.
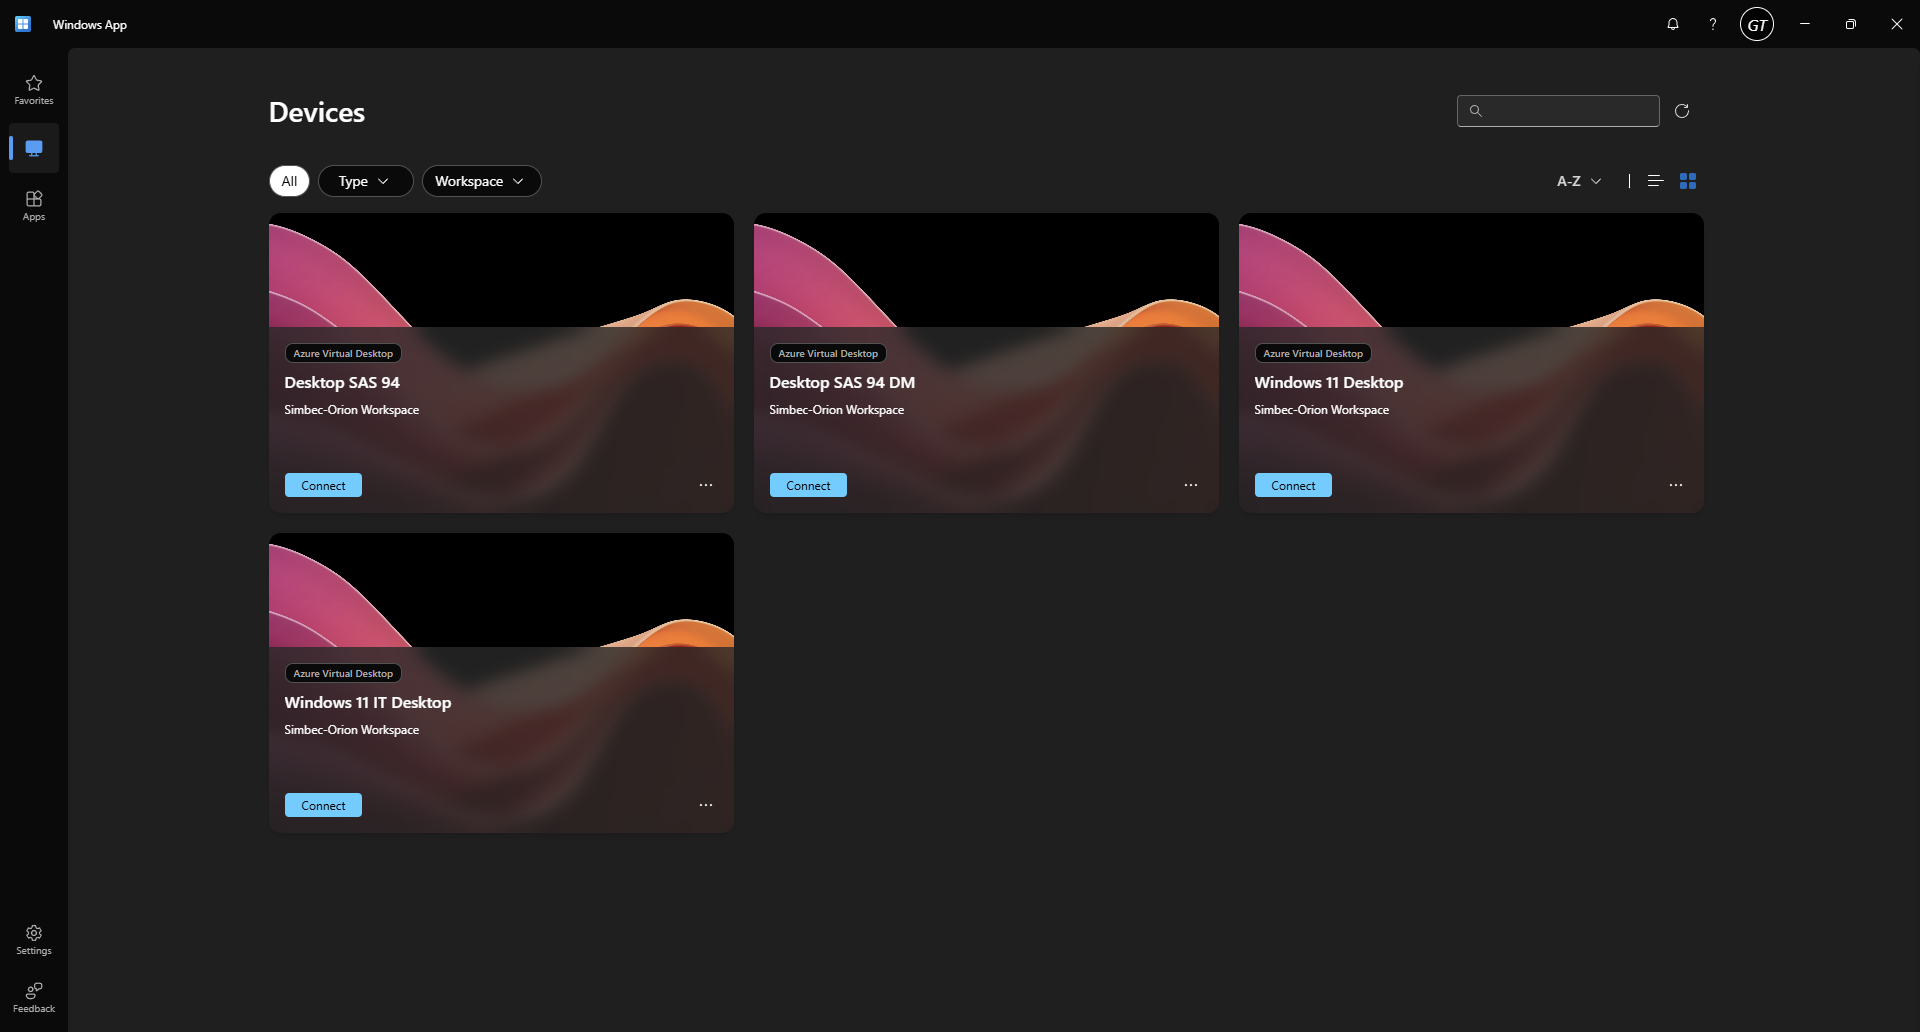
- Double-click any available resource to open your desktop or application.
Simbec Orion Contractors
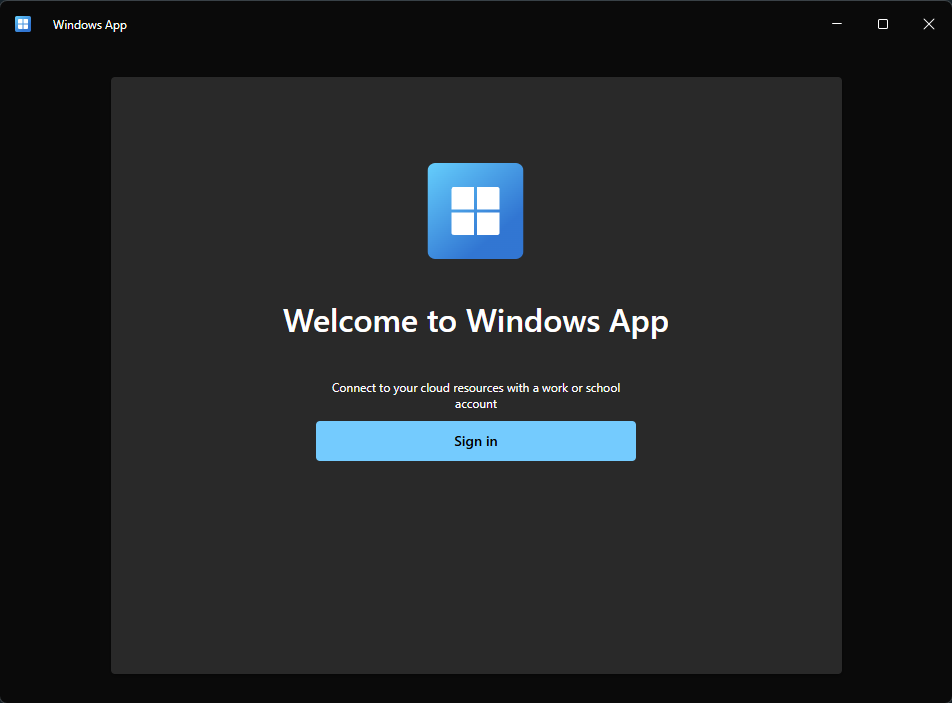
This section covers guidance for contractors using their own equipment, such as a personal laptop, tablet or phone. Below you’ll find how to install the Windows App to access AVD.
↧ Installing the Windows App (AVD)
Windows 10 / 11
The Windows App is available from the Microsoft Store and can be installed on Windows 10 and 11.
- Navigate in your web browser to https://avd.simbecorion.com.
- Select the “Windows” download option.
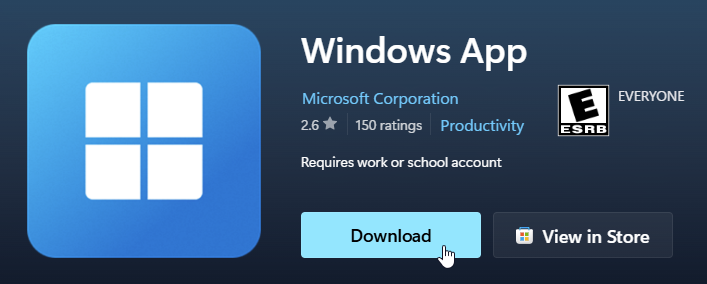
- Click “Download” and follow the on-screen wizard to install the app.
- Open the application and click the “Sign in” button.
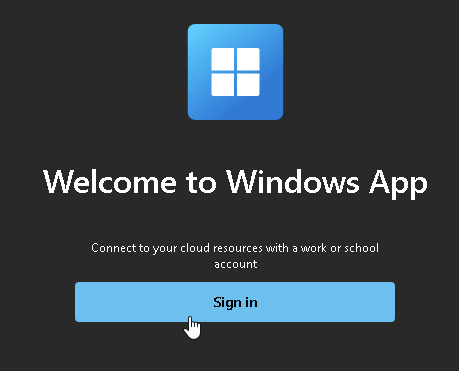
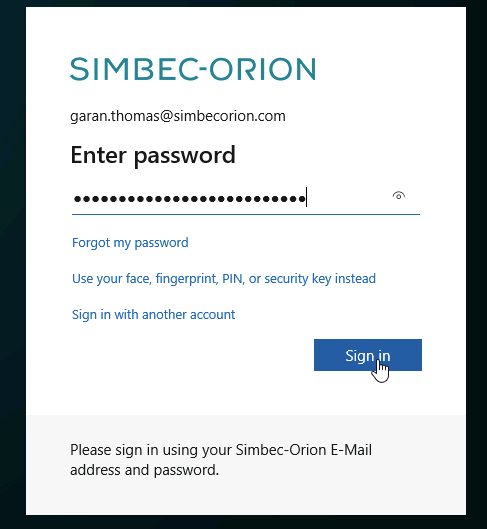
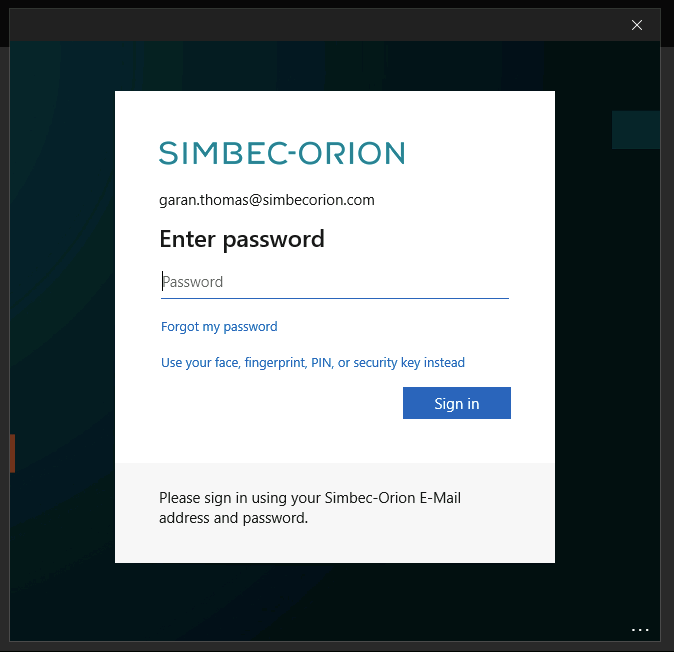
- Sign in with your “@simbecorion.com” email address and password.
- You may be prompted to set up Microsoft Authenticator on your personal device for multi-factor authentication.
- Download Microsoft Authenticator on your mobile device:
- Open the app and follow the on-screen steps to set it up as your MFA for AVD.
- Once set up and signed in, you’ll see the applications and desktops allocated to you.
macOS
The Windows App is available from the macOS App Store and can be installed on macOS systems.
- Navigate in your web browser to https://avd.simbecorion.com.
- Select the “macOS” download option.
- Download the “Windows App” for your Mac and open it.
- Open the application and click the “Sign in” button.
- Sign in with your “@simbecorion.com” email address and password.
- You may be prompted to set up Microsoft Authenticator on your personal device for multi-factor authentication.
- Download Microsoft Authenticator on your mobile device:
- Open the app and follow the on-screen steps to set it up as your MFA for AVD.
- Once set up and signed in, you’ll see the applications and desktops allocated to you.
Windows App — Tips, Tricks & Tutorials
Quick guidance on using the Windows App to access AVD, including settings to tailor your experience.
Signing in
When you open the Windows App you’ll be signed in automatically on a Simbec Orion provided laptop. On your own equipment, sign in as below.
Windows 10 / 11
Click the “Sign in” button and log in with the credentials shown below. If there’s no sign-in button, click the plus (+) icon in the top right, select a work or school account, then continue.
macOS
Click the + button in the top right, sign in with a work or school account, and use the credentials below.
MFA (Multi-Factor Authentication)
AVD uses Microsoft Authenticator. If you don’t already have it set up, the system will walk you through it on your first sign in. You’ll need it to authenticate every time you log in from a non Simbec Orion device.
- Enter the credentials shown above. Your username is saved for next time — you’ll only re-enter your password and MFA when reopening the app.
- After your password, you’ll get a notification on your phone to enter a 2-digit number shown on screen.
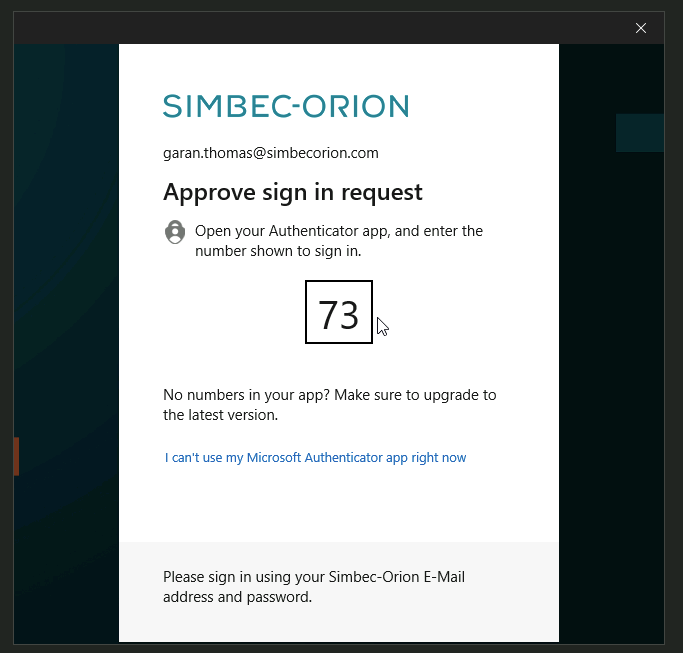
- Once approved, you’ll see the Windows App and the resources available to you.
Configuring the Windows App (displays)
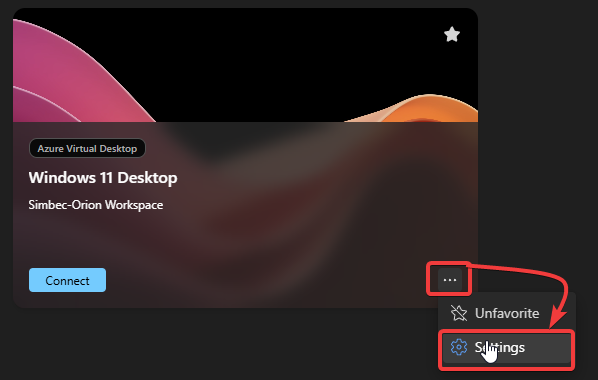
You can configure how AVD displays on your local machine. Click the … in the bottom-right corner of your desktop instance before connecting and open the “Settings” menu.
Untick “Use default settings” to change the display options. We encourage you to experiment to find what works best for you.
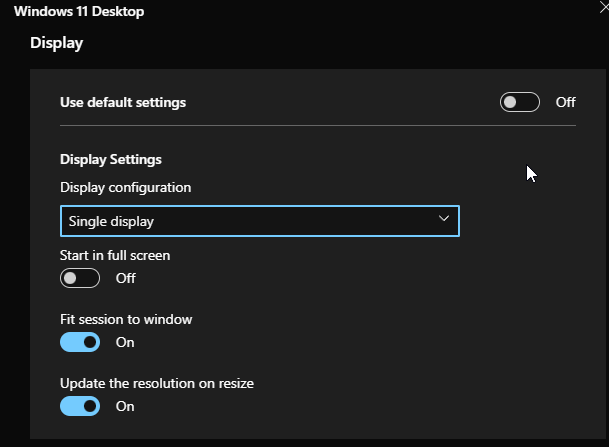
Under “Display configuration” you can choose:
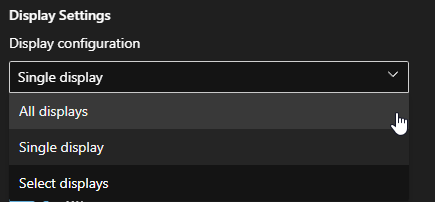
- All displays — uses all available monitors in fullscreen.
- Single display — uses your primary display in fullscreen.
- Select displays — lets you choose which displays are used.
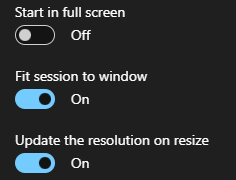
Single display additional options:
- Start in full screen — defaults to full screen rather than windowed.
- Fit session to window — fits AVD to the window.
- Update the resolution on resize — dynamically changes resolution as you resize.
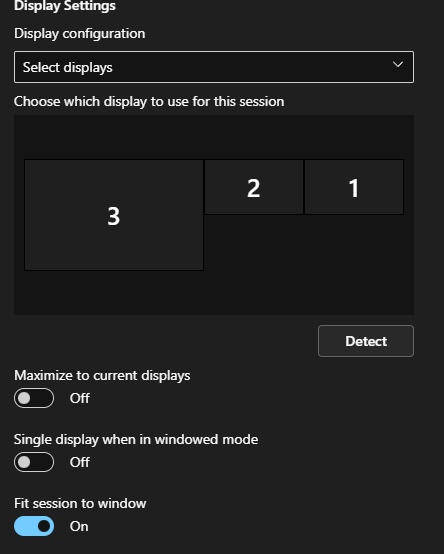
Select displays additional options:
- Maximize to current displays — defaults to the maximum size of the selected monitor.
- Single display when in windowed mode — switches to one monitor when you exit fullscreen.
- Fit session to window — fits AVD to the window.
Webcam & microphone permissions
On your first desktop session, your machine will ask to grant the Windows App permission for your webcam, location and microphone — used for conferencing apps such as Teams and Zoom within AVD.
If you accidentally clicked “No” or have permission issues, follow the steps below.
Windows 10 / 11
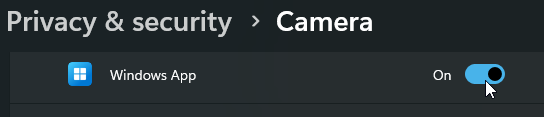
Search your Start menu for “Camera Privacy Settings” or “Microphone Privacy Settings” and ensure the Windows App is switched “On”.
macOS
- Choose Apple menu > System Settings, then click Privacy & Security in the sidebar.
- Click Microphone or Camera.
- Turn access on or off for the Windows App in the list.
Keyboard shortcuts
Windows 10 / 11
Keyboard shortcuts work as normal — for example Ctrl + C to copy, Ctrl + V to paste and Ctrl + P to print.
macOS
On a Mac the modifier keys differ slightly. To ensure proper functionality, enable the following option within the Windows App:
- Once connected to your AVD session, locate the very top bar on your monitor.
- Select “Connections > Keyboard Mode > Unicode”.
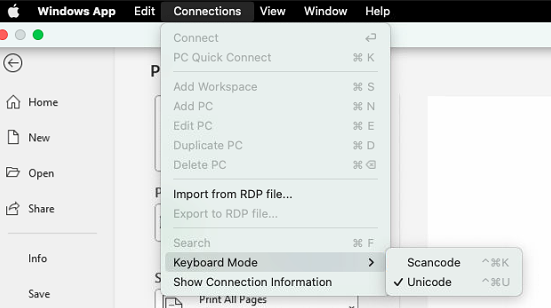
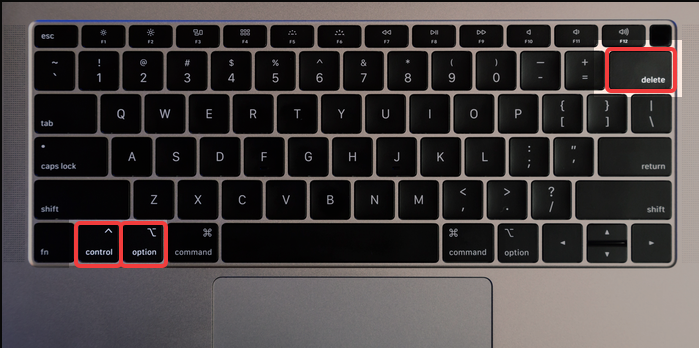
- You can now use Control + C, V, P where you’d usually use the ⌘ key.
Language & keyboard layout
AVD lets you select from a variety of languages and keyboard layouts. By default it starts in English.
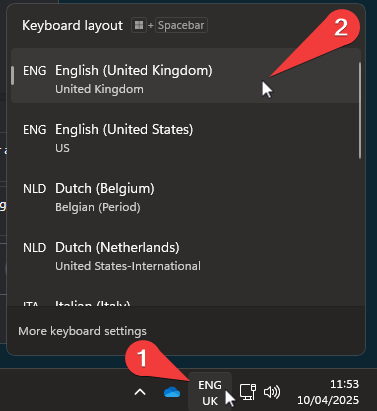
Changing keyboard layout
In the taskbar (bottom right, next to the network and clock) you’ll see the current keyboard layout. Click the icon and choose your desired layout.
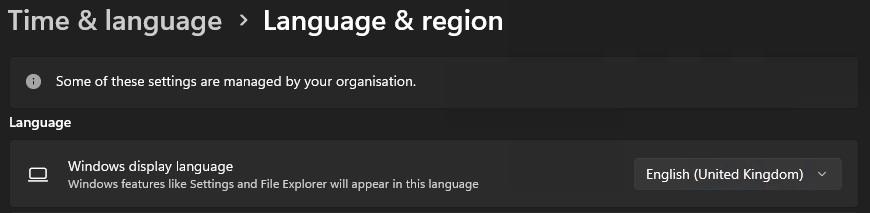
Changing display language
- On the Start menu, search for “Language”.
- Select “Language Settings”.
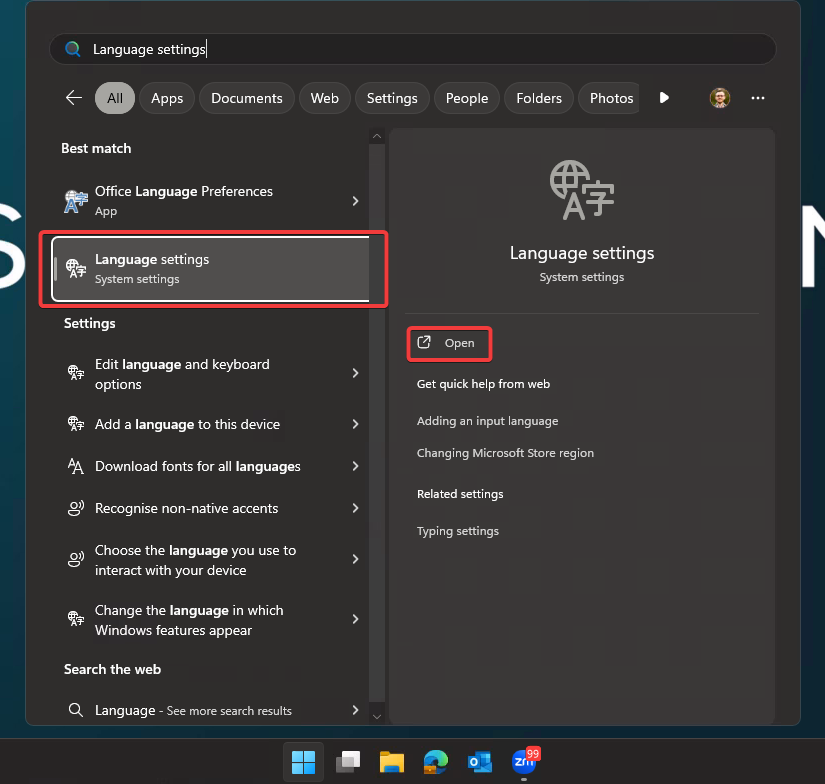
- Use the dropdown on the right to change your Windows display language, then close the window.
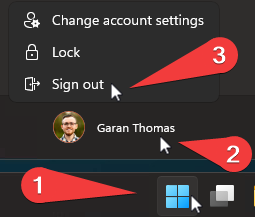
- For changes to take effect you must sign out of AVD and sign back in. Go to the Start menu and click your picture / name.
- Click “Sign out” and wait for the session to fully sign out.
- Wait 5 minutes, reconnect to your AVD session, and your new display language will be in place.
File management
File management in AVD differs from your usual laptop, as the virtual machines are temporary and disposable. Here’s what that means for you.
All files in your AVD are managed through OneDrive. In File Explorer you’ll see your synced folders — OneDrive, Desktop, Documents and Pictures — plus three network drives: Client Folders (I:), Home Drive (L:) and Department Folder (T:).
Your Desktop, Documents and Pictures folders are automatically synced with OneDrive, so your files are backed up between sessions. You can organise this area however you like — for example creating a custom Downloads folder.
OneDrive uses Files On-Demand: files stay in the cloud until you open them, avoiding filling up AVD’s limited local storage. When you open a file, it downloads automatically.
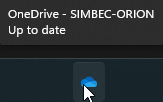
On your first login your Desktop and Documents folders might appear empty — don’t panic. OneDrive will sign in and sync in the background. Hover over the OneDrive icon in the system tray to confirm it says “Up to date”.
Network drives explained
- I Drive — Client Folders: active study folders and related documents for client-specific data.
- T Drive — Department Folder: files specific to your department, managed for collaborative work.
- L Drive — Home Drive: your personal network drive for private, work-related files.
Personalise AVD
You can customise your AVD desktop, such as enabling dark mode or changing the taskbar position and icons.
Customise Windows appearance
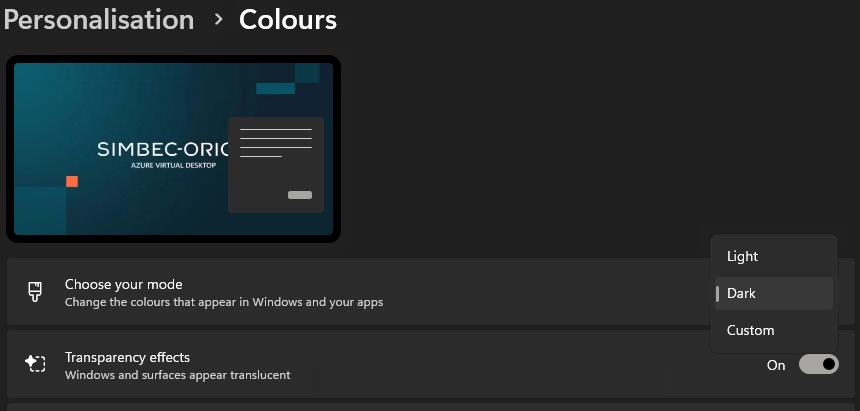
- Right-click the desktop and select “Personalise”.
- Change colours, accent colour and light/dark mode.
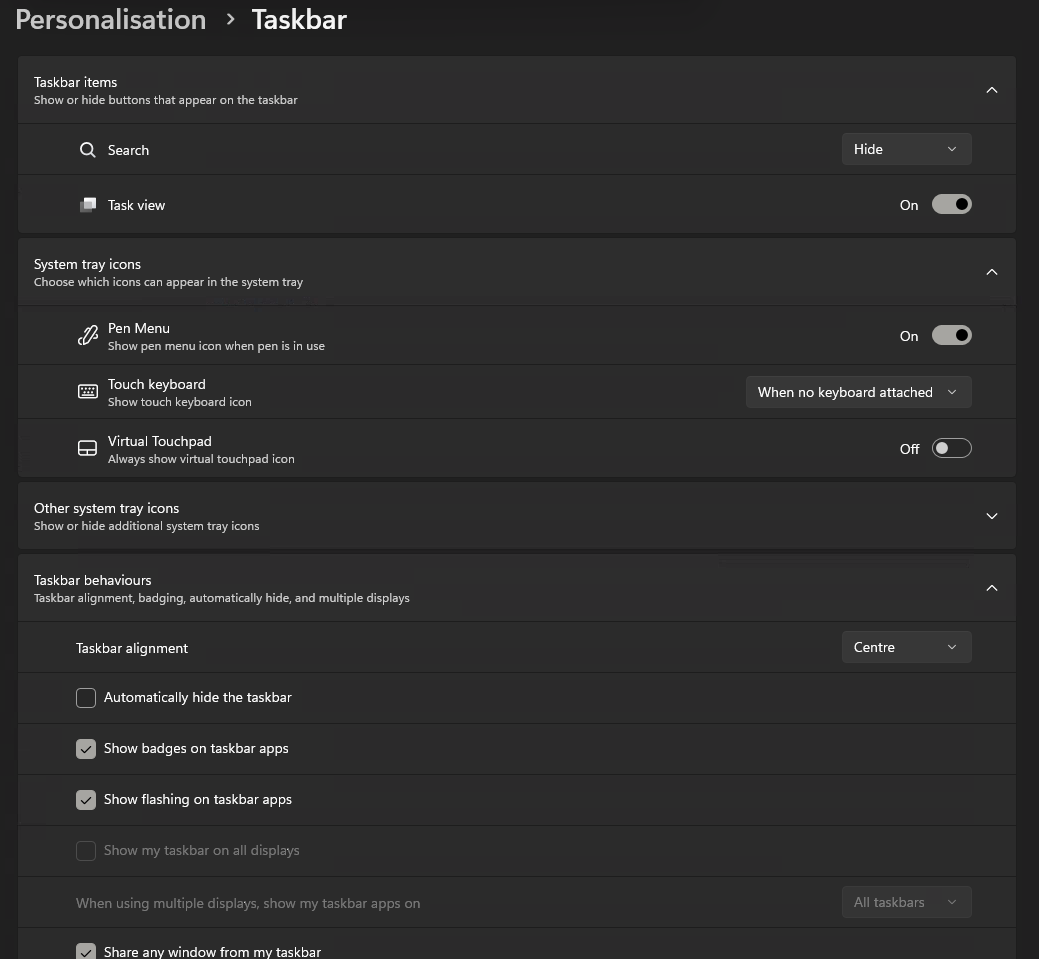
Customise Windows taskbar
- Right-click the taskbar and select “Taskbar Settings”.
- Customise icons, the search box, or move the taskbar from centre to the left.
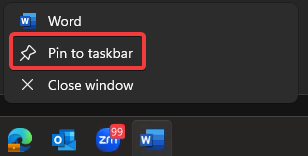
Pinning applications
Drag and drop applications such as Word or PowerPoint to the taskbar, or right-click an open icon and select “Pin to taskbar”.
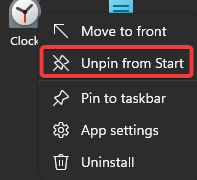
You can also drag and drop applications to the Start menu, or right-click an existing app and select “Unpin”.
Security of AVD
For security purposes there are some limitations and processes in place on AVD.
- You must set up and use MFA to log in to AVD every time you begin a new session. Your first login walks you through the process if it isn’t already enabled. This requires a smartphone running Microsoft Authenticator.
- Your session will expire if you disconnect for 2 hours and automatically sign you out to avoid stale connections. Save your work and ideally sign out if you’ll be away for a while.
- One-way clipboard redirection: you may copy links and text into AVD, but you cannot copy out of AVD and paste onto your local machine.
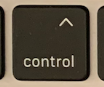
Changing your password
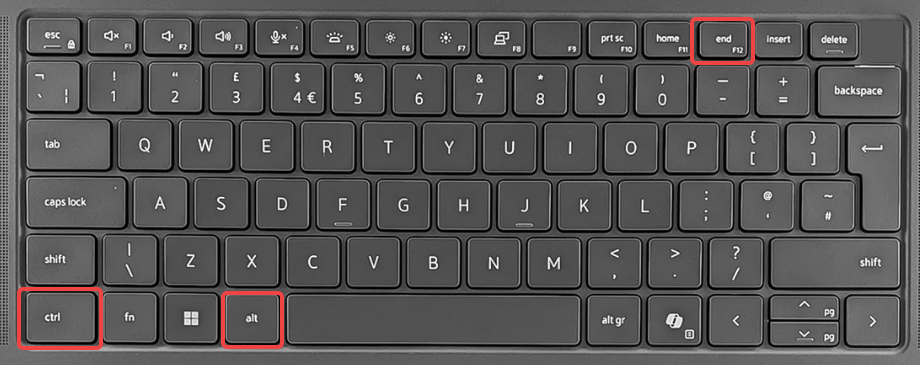
You can change your password from within an AVD session using the keyboard shortcut for your device. Once pressed, choose “Change a password” on the security screen and follow the prompts.
Windows computer
Apple Mac keyboard
Contact support
You can contact support for anything AVD related using the methods below.
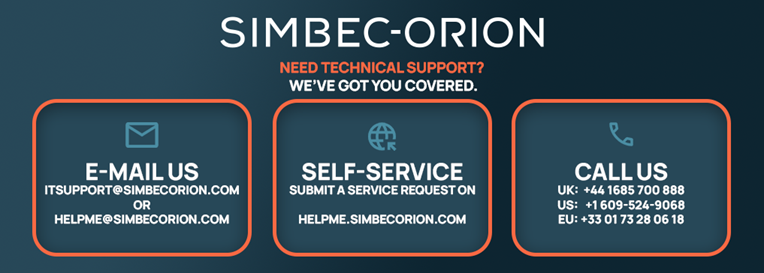
Visit helpme.simbecorion.com or email [email protected].